

Making Candles with Candle Molds
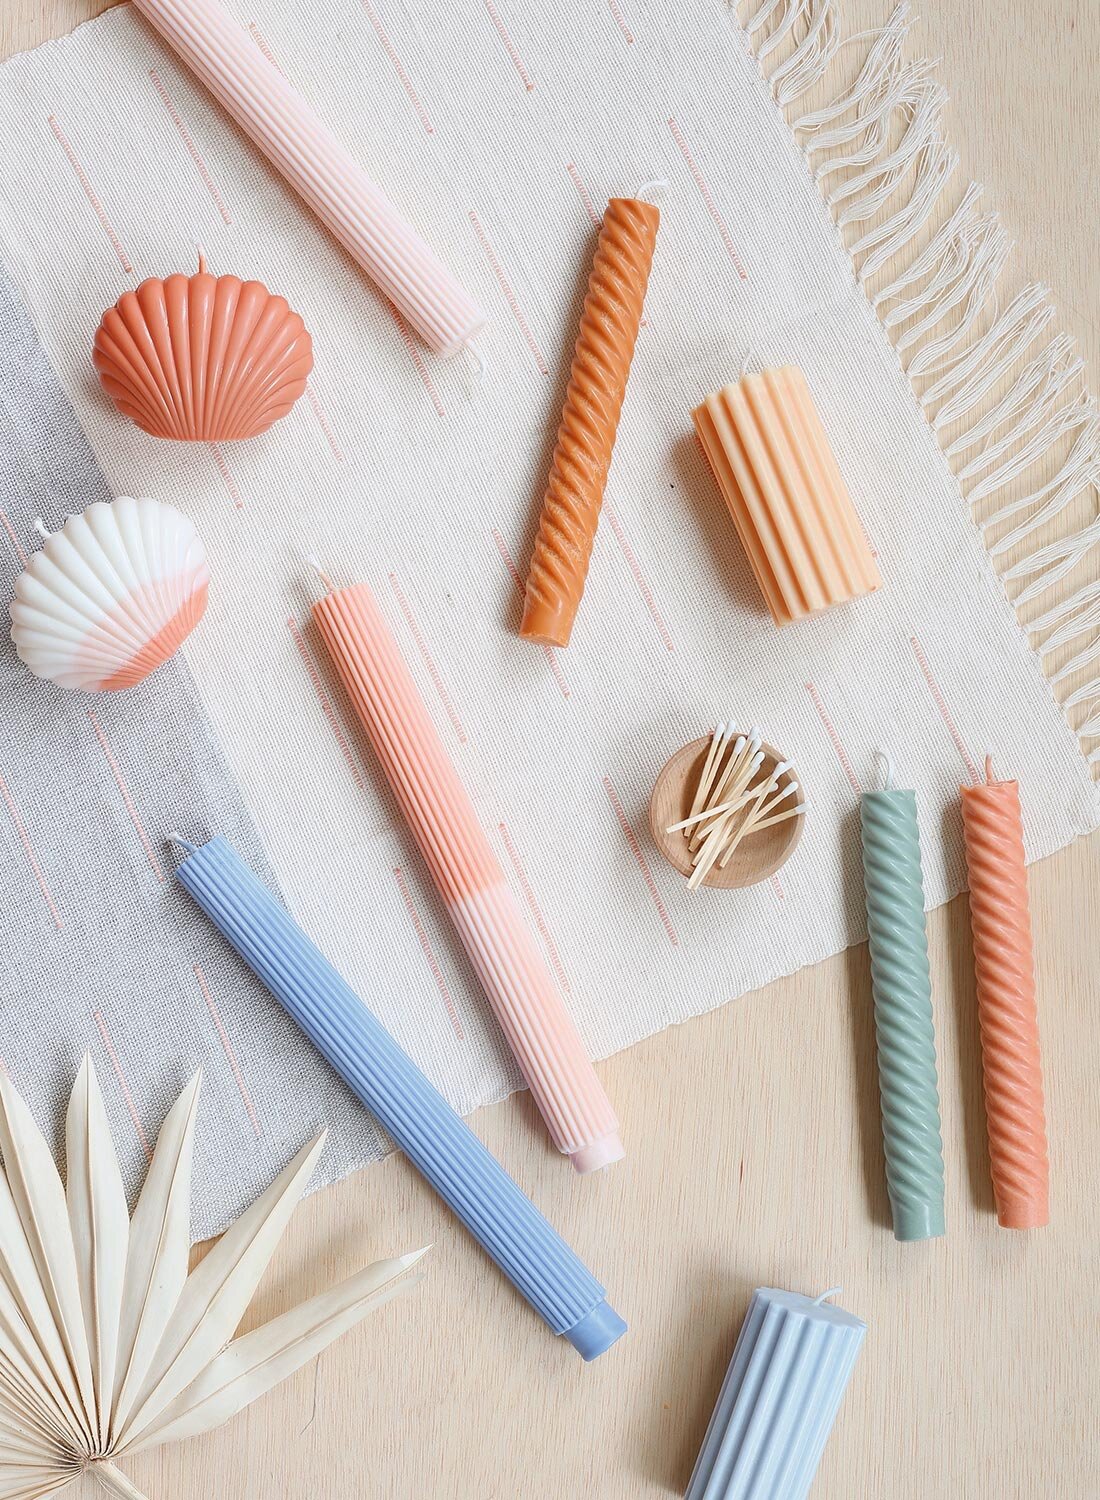
I love candles and sometimes, when I’m designing, I’m looking for specific colors or shapes which can lead me down an endless internet search with no success. So I decided to try making my own and it’s been some of the most fun I’ve had. After you get the hang of it, It’s actually pretty easy!
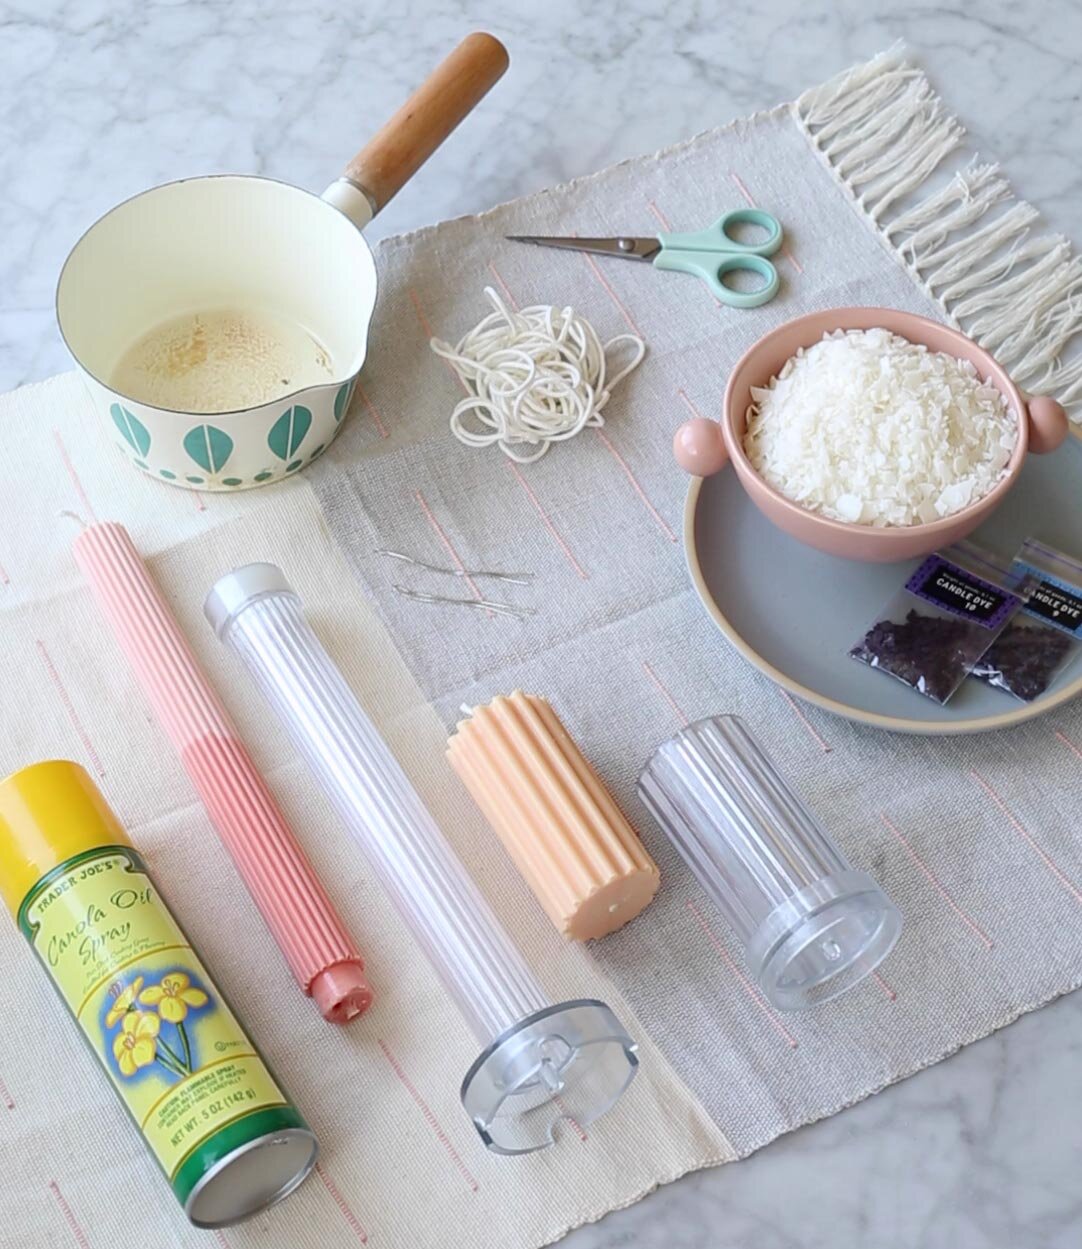
You don’t need much to get started and you can easily find most of the supplies online. I found my candle molds, soy wax, and dye on various websites including Amazon and Etsy. Links below.
Supplies:
Candle Molds - Pillar Candle, Shell, Long Spiral, Various Shapes
Candle Wax Chips (I use soy wax but there are other options)
Canola Oil Spray (or basically any oil will work as a lubricant)
Wire or Paper Clip
Scissors
Cooking Pot (ideally with a spout)
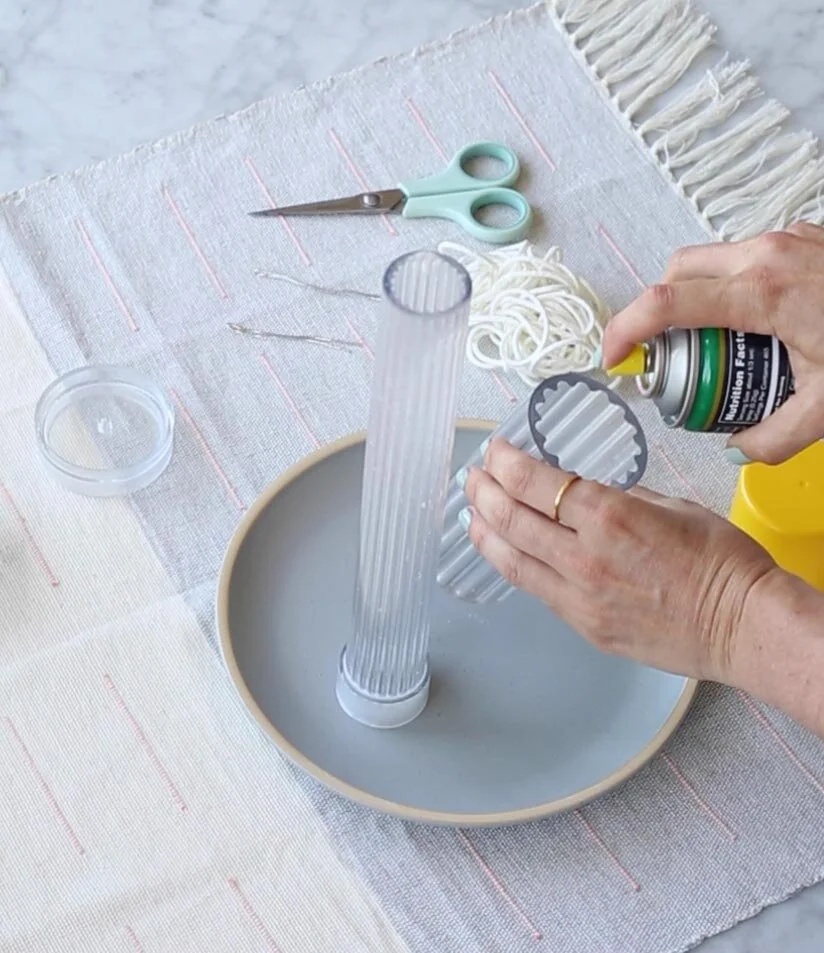
Step 1 - Lubricate the Candle Mold
Apply oil to the inside of your mold. You don’t have to go crazy but try to cover the surface as best you can. This will really help when it’s time to remove the candle. If your mold has a removable base I recommend taking it off before you apply the oil. This will prevent getting oil on the wick when you pull it through the base which can make things a bit messy.
Step 2 - Set Wick in Mold
I’ve found it helps to cut the end of the wick at an angel to help get it through the base of the mold. The wick should fit snug through the provided hole. Pull it through the mold with about 1” overhang. Cut the wick at the base leaving about an 1” of length. Fit the base on the mold and use the wire to hold the wick taught and in the middle of the mold.

Step 3 - Melt Wax
Officially you’re supposed to heat the wax until it reaches 140 degrees but I just heat it until it’s melted to liquid. It doesn’t take long. Best to use an old pot that isn’t needed for cooking but you can clean the wax out of the pot with some effort.

Step 4 - Add Dye to Melted Wax
I’ve experimented with both liquid dye and dry dye chips. I’ve found I have more control over the intensity of the color with the dry dye chips but either works well. I use an old chop stick to stir in my dye. Also, as you might have guessed, the final color after the wax has set will always be a little different than what you start with so this is definitely a trial and error process. The cool thing is, you can re-use any mistakes as dye for future candles.

Step 5 - Pour Wax Into Molds
Once you have the color where you want it, simply pour in the wax.

Step 6 - Remove Candles From Molds
Once the wax sets gently remove the bottom of the mold and push the candle out. If you have any trouble removing the candle try putting the mold in the freezer for at least 10 minutes.

Finally, just trim the wicks and you’re done! Good luck!
You can also watch my DIY video on Instagram.